qBackup and Backblaze B2 Cloud Storage
Oct 14, 2019
Backblaze B2 Cloud Storage
Backblaze is a company offering unlimited online backup services. In June 2016, they launched the official version of Backblaze B2 Cloud Storage, a metered object storage service. Backblaze B2 Cloud Storage is characterized by price, it is the lowest price compared to other object storage services like Amazon S3 (Cloud Storage Comparison). Just by registering your email address, you can use 10GB free service with no time limit. If you use more than 10GB you will need to register your payment information, but you can continue to use the first 10GB free.
You have two choices to back up your files to Backblaze. The first one is Backblaze B2 Cloud Storage with a backup application like qBackup. The second one is Backblaze Unlimited Backup. Each has its own characteristics, which one is better to choose depends on the situation. Refer to the table below.
| Backblaze B2 Cloud Storage with qBackup | Backblaze Unlimited Backup | |
|---|---|---|
| Trial | 10GB Free with no time limit | 15-day free |
| Storage Pricing | $0.005/1GB/month (*1) | $5/month (per computer) |
| Backup Application | qBackup (Windows/Mac/Linux) | Backblaze Client Software (Windows/Mac) |
| Restoring | Directly restore files/folders from qBackup | Restore from Backblaze website |
| Backup Exclusions | - | NAS, Time Machine, etc. |
| File Versions | No limitation | Up to 30 days |
(*1) Additional fee may be charged for downloading and transactions.
qBackup is listed on the Backblaze B2 Integrations. This page introduces how to backup to Backblaze B2 Cloud Storage using qBackup.
Sign up for Backblaze B2 Cloud Storage
Go to Backblaze B2 Cloud Storage, enter your email address and password, and click [Sign Up for B2].

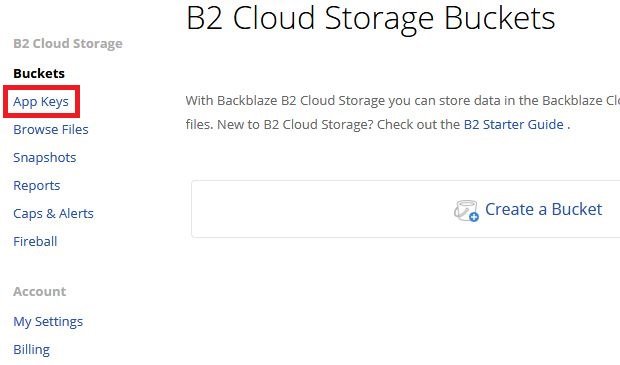
Select [App Keys] from the B2 Cloud Storage menu.
Your keyID is displayed on this page. Click [Create New Master Application Key] to create an Application Key.
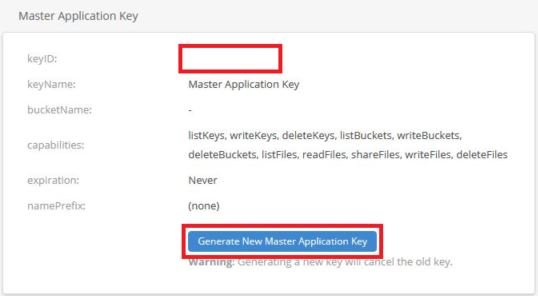
qBackup uses the keyID and the Application Key to access Backblaze B2 Cloud Storage.
Installing qBackup
Download qBackup installer, and run the installer and complete the installation according to the instruction.
Creating project (backup configuration)
Run qBackup, and click [New] on the toolbar.

Enter project name.

Adding backup sources
Select [Include], and add files and folders to be backed up.

Files to be backed up
Any number of files and folders can be added.
You can add and delete files after backup is executed.
You can specify exclusions on [Exclude].
Storage
Select [Storage] and set storage information.

| Field | Description |
|---|---|
| Storage type | Backblaze B2 Cloud Storage |
| Key ID | The keyID confirmed on Backblaze website |
| Application Key | The Application Key created on Backblaze website |
| Bucket name | The bucket name must be unique for the entire Backblaze B2 Cloud Storage. qBackup creates a bucket if it doesn't exist. We recommend that you create a dedicated bucket for qBackup. |
| Prefix | Specify if you want to create a virtual folder in the bucket. The prefix enables you to create multiple backups in the bucket. If the prefix is blank, backup data will be created just beneath a bucket. |
Options
Select [Options] and set each item as necessary. Backup can be executed even in the initial state. Set encryption password if you need to encrypt backup data.

Uploading speed
If the uploading speed is slow, you may be able to improve by changing the [Max threads] (Storage).
Click [OK] to save the project.
Backing up
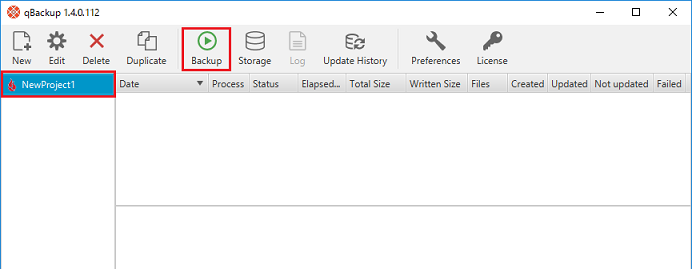
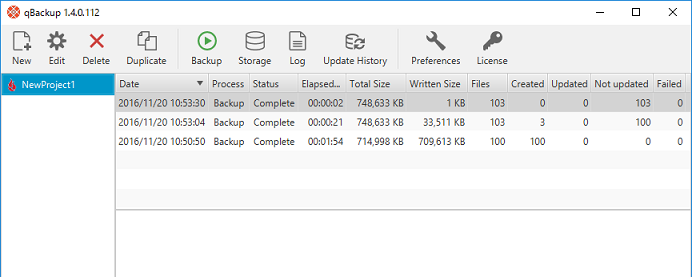
Select the project you created. Click [Backup] on the toolbar to start backup.
The processing status is displayed on the window during backup.
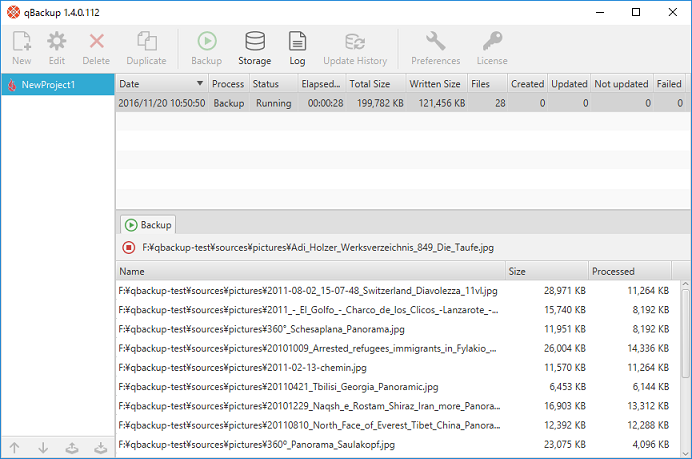
When the backup is completed, the processing status becomes [Complete].
For the second and subsequent backups, only changes from the previous backup are backed up (incremental backup).
Restoring backed up files
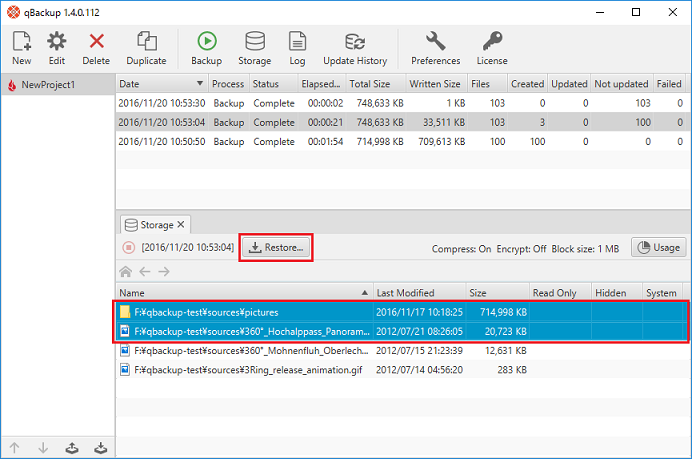
Select the backup you want to restore and click [Storage] on the toolbar.

The files backed up in the storage are displayed.
Select the files/folders you want to restore and click [Restore].
Find files to be restored
By double-clicking a folder, you can move into the folder.On the window that appears, enter conditions such as the destination and click [OK].

The processing status is displayed as in the case of backup.
For more information please refer to the documentation of qBackup and Backblaze B2 Cloud Storage.